You’ve conquered cutting. You’ve solved sanding. You’ve built some model kits, placed them gently on your desk, and asked yourself, “what now?” Good news, dear reader! Finishing the kit isn’t the end unless you want it to be. In this finale to the beginner’s guide, I want to introduce you to where you can go from here and what new things and new model kits you can try to get even more out of these little plastic robots.
Perfect Posing
To start, we need to work on the perfect standing pose. I struggled with this for a while, but after getting a few tips from other gunpla fans, I wish to pass the secrets to you. Let’s look at my Ez8 and pose him as stiffly as possible.
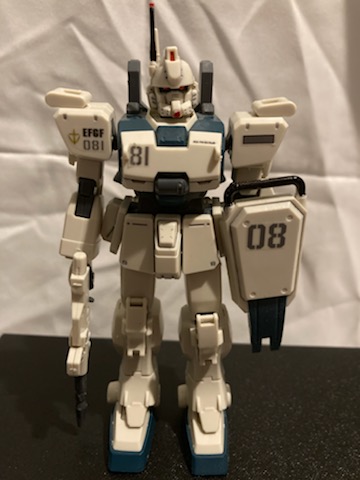
Looks… off, doesn’t it?
There are several reasons for that, and the first thing we need to get right is weight distribution and proper limb spacing. The legs should be about shoulder-width apart, with a slight bend in the knee. The feet should be flat on the ground. If going for a regular, resting pose the arms should be just slightly out, with the elbows pointed outward and the forearms raised a small amount. I’ll give mine a pose to give it the illusion of holding the gun. Then we straighten up the head and angle the chin slightly downward to give it some intimidation factor…and…
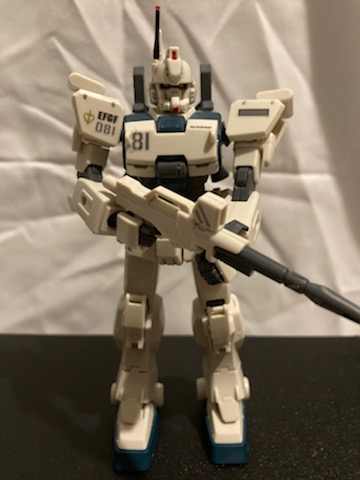
There we go! Not perfect, but far more body language gets conveyed this way, and it looks much more like the weapon of war it is. The same principles apply in most posing instances. For something more dynamic, like a flight or attacking pose, you still want to keep all of this in mind. You’ll also need an action base for flight poses. I’d suggest looking at the stock photos or some frames of animation and copying the pose you want. Don’t get discouraged if it doesn’t turn out right the first time.
Non-Gundam Kits
From here let’s examine non-Gundam model kit lines, as some of these are wonderful in both design and gimmicks. The RG Evangelion kits are awesome and their more organic design is a good contrast to Gundam’s rigid and angular looks. In my first piece, I also mentioned the Sakura Wars mechs. I have my issues with these kits, but I like the more stout and round design on display here and they are a favorite despite the drawbacks in color separation. They also have fully modeled cockpits, complete with (unpainted) pilots!
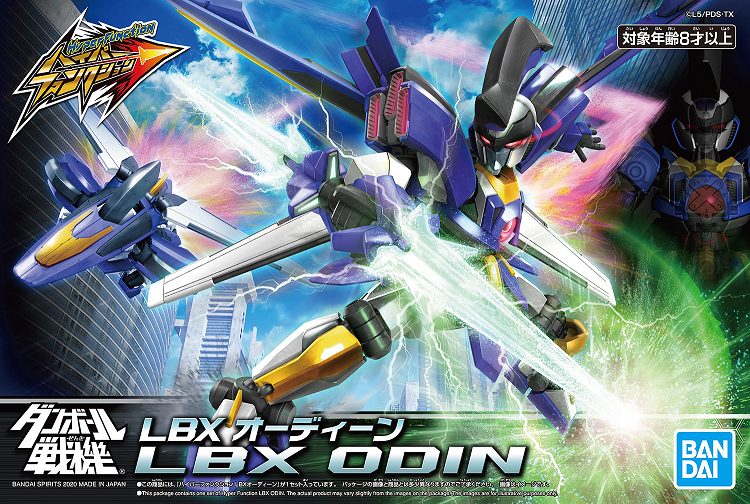
I also suggest looking into the Hyper Function LBX line, which I briefly mentioned in my last piece. Does anyone remember LBX (aka Little Battlers eXperience or Danball Senki ダンボール戦機 in Japan)? No…? Just me? Alright then. Anyway, these kits are amazing. They start with an inner frame, just like in the show/game and you attach the armor to it. These have, without a doubt, the best color separation I’ve seen outside of the RG/MG/PG Gundam kits. I recommend the Odin, as it has a transformation function and a nice, sleek design. There’s one other LBX line that lacks the inner frame, articulation, and detail, but they are cheaper to compensate.
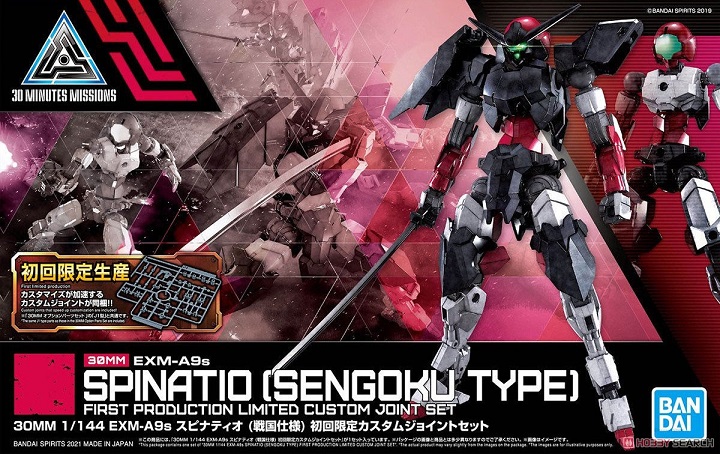
Finally, there’s Bandai’s 30 Minutes Missions model kit line. There are all completely original mech designs, are meant for quick builds, and are the ultimate in customization. I have seen some downright amazing customs come from kitbashes (combining two or more kits) involving these models and I hope to do an article on them in the future. These are cheap, well designed, and have so many options (with some expansion kits from weapons to armor being sold separately) that there’s no way I could fit them all in here. If you want to get into kitbashing, this is an excellent place to start.
Non-Robot and Non-Bandai Kits
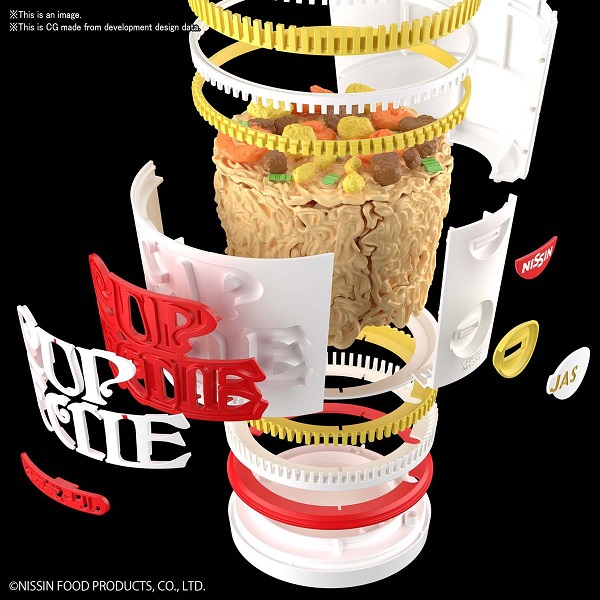
If you want something other than robots, Bandai also does Pokémon model kits, as well as some more off-the-wall picks like a Playstation 1 and a full-scale cup of Cup Noodle ramen under the “Best Hit Chronicle” line. I have the ramen cup kit and it’s a favorite of mine. I took it to the last competition I attended and though it didn’t win any awards, it got a ton of attention, even confusing one of the judges. It truly looks just like a cup of ramen. The Pokémon kits I’ve done are all great as well, and they have either some articulation or a gimmick like flapping wings or Gengar’s extending tongue. There’s a wide range available too, with fan favorites like Gardevoir, Mimikyu, Garchomp, and Mewtwos. Bandai has even gone as far as doing Digimon, and Star Wars, which are all great kits from what I’ve seen.
So is the hobby JUST Bandai? I also hope to cover this in greater depth in another article, but the short answer is no. Kotobukiya is one of the other major model kit suppliers and they handle series such as Muv-Luv, Metal Gear, Megaman X, Zoids, and a few others. At current writing, I’ve only done one of the Megaman X kits, and I was really happy with it. They’re a bit more expensive than Bandai’s offerings but they are comparable to an RG when it comes to their excellent color separation and decent size.
Intermediate Techniques
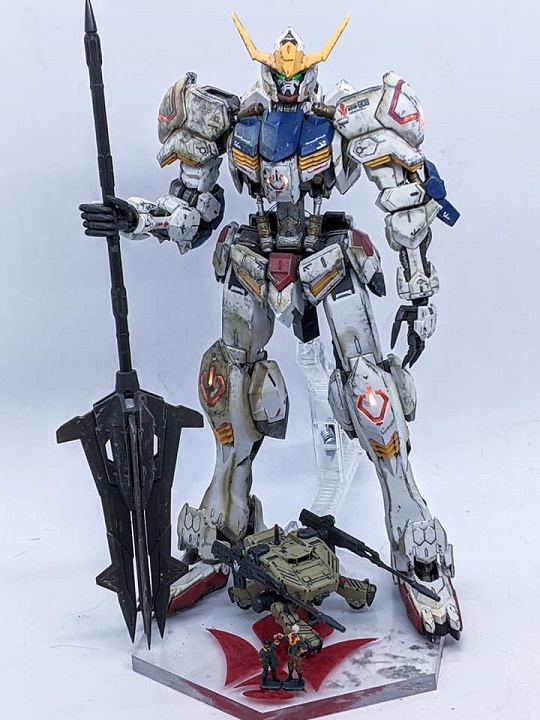
Lastly, if you want to up to your gunpla game, you can begin to work towards intermediate techniques like weathering and painting. These are more advanced techniques and lead to models which look much more grounded and realistic. Weathering can be done fairly cheap and easily, but painting is where the price of the hobby can begin to soar. I hope to cover these in a future series focused on intermediate techniques. Weathering alone can tell a story and show neat details like battle damage, and when I made my first incredibly simple diorama, weathering was the most fascinating to me because it made something plastic look like it was made of metal, with real damage. With the right paint and tools, you can make some very realistic-looking stuff. Below is a model kit that was weathered and painted by a long-time builder in my local gunpla group.
I hope you enjoyed this series and I hope that it helped you take your first steps into this wonderful hobby. The sky is truly the limit here and I cannot wait to see what some of you build.


